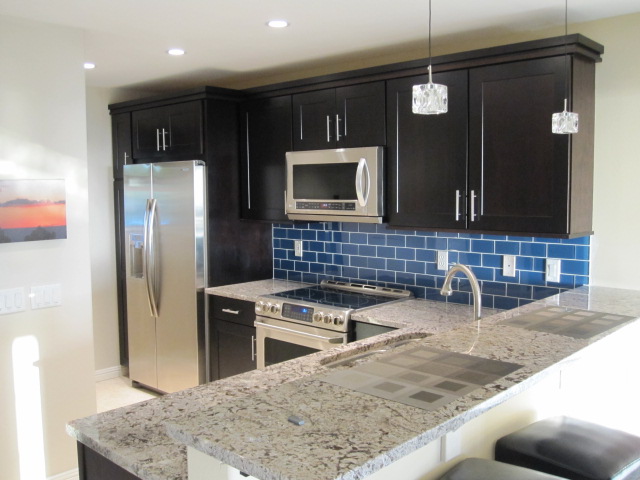
Kitchen Remodel...From Start to Finish.
 Anyone can take charge of their own kitchen remodel as an owner-builder. You will just need to be thorough in your planning and follow our checklist below.
-
Decide on a rough Layout: This includes overall design including location of walls, windows, appliances, islands, and built-ins for your new kitchen remodel. You may want to work with a kitchen designer on this one. A professional that designs kitchens for a living can come up with some very interesting ideas that you might not have thought of. This includes creative storage solutions for your cabinets and lighting that changes the mood of your space depending on each particular use (i.e. food prep vs. entertaining).
-
Check on Permits/HOA: Depending on how extensive your kitchen remodel is, you will probably need to get a permit from your local building department. You may want to go over the general design with them to see if they have any special requirements before you get too far along. You will also want to check with your community association to get approval if your kitchen remodel affects the outside of your home or if you live in a condominium or townhome. Multi-family dwellings typically have specific design criteria…I once remodeled an older condo whose board required special noise abatement for any new hard floors installed on a second floor. They may also have special requirements for any modifications to the structure and almost always require you to start and end work at certain times of day to keep the noise levels down.
-
Select Your Finishes for Your Kitchen Remodel…
-
Cabinets: including crown, light rail, end panels, glass panels, hardware, & special storage solutions
-
Lighting: including undercabinet, overcabinet, in-cabinet, pendants, and recessed (don’t forget about artwork lighting)
-
Countertops: including material, color, edging, finish, thickness
-
Kitchen Sinks: including mounting (undermount vs. drop-in) or the farmhouse style (the kind with the front edge exposed) which will require a special sink base cabinet for your kitchen remodel
-
Faucets: including instant hot water, filtered water, soap dispensers, sprayer, pot filler
-
Flooring: Stone, ceramic tile, hardwood (including engineered), laminate, vinyl
-
Appliances: including wine chillers, built-in coffee makers/cappucino maker,water dispensers, double ovens, microwaves, dishwashers or dishwasher drawers, warming drawers…etc.
-
Wall colors: I like to get a sample or two of these on the wall and let them dry before committing. (I’ve painted too many walls twice in my day)
-
Trim Details: includes crown at ceilings, chair rail, door casing (these can affect the cabinet layout for your kitchen remodel)
-
Finalize Layout for Your Kitchen Remodel: Now that you have your appliances, sinks, faucets and lighting you can finalize the cabinet layout. Some people like to finalize the cabinet layout first…this is a matter of preference. I personally have found that most people have specific appliances and sinks in mind so it’s more practical to finalize the cabinet layout after the model numbers are selected. That way, we can design the kitchen remodel around them. The actual cabinet layout is typically done by the company supplying the cabinets. They have first-hand knowledge of standard sizes, storage options, trim options…etc. So, don’t bother paying your kitchen designer for this as the cabinet supplier will typically do it for free on your kitchen remodel.
-
Bid out the Work for your kitchen remodel: Since we have all our specifications and our overall design, we can now get a minimum of three bids per activity. Never get any less than three bids. Just to give you an example of how different bids can be, let me share with you the bids from my kitchen remodel. My granite bids were$1800 different on an overall job cost of $3800. That’s almost 47 percent! For the cabinets, the difference was 40 percent! So, always, always, always get a minimum of three different bids. Make sure you include in your bid request lead times. This tells you how long it takes to get a product after ordering… which might affect choices. For videos on how to bid out work go to Build Your Own House: Bidding Out the Work.
-
Select your vendors: I wise home builder told me when I was young…”The sweetness of a low price quickly fades but the hassles of poor quality can last a lifetime.” Don’t forget, value is more than price alone when selecting your trades and suppliers for your kitchen remodel. Be sure to always check references and preview past work whenever possible.
-
Sign Subcontracts: I’ve said it a hundred times before and I’m sure this won’t be the last…get everything you expect to happen in writing and have the trade sign and date it. You don’t need selective memory on your kitchen remodel project.
-
Order Materials: The cabinets for our latest kitchen remodel took four weeks to get…which is pretty standard. Flooring and appliance lead times can be all over the board so get those ordered early as well. This is a good time to select your granite slabs from the supply yard.
We've talked about all the necessary steps to tackle before you start demolition/construction of your new kitchen remodel. Here we will discuss demolition, construction, scheduling, and how to minimize the affects of construction on the rest of your home.
Demolition: Once we have the materials for our kitchen remodel, we can start demolition. Assuming you will be living in the home during construction, we want to shorten the schedule as much as possible. For this reason,we wait to start demolition until all materials have arrived or are in stock and on hold for your kitchen remodel. Don’t rely on “supposed to be” or “maybe” from your suppliers…these will get you into trouble. There is nothing worse than having your kitchen torn apart with nothing going on.
As for the items removed during demolition, I try to save anything that could still be used and donate it to Habitat Restore. If you don’t have a Restore by you, try calling the local Habitat for Humanity to see if they can use your items…anytime we can donate or reuse items versus sending them to a landfill is a good thing. I have also used craigslist to sell or give away items. On this kitchen remodel, I gave away a range just because I didn’t want to take it to the landfill.
Also, to keep the dust contained to the kitchen, be sure to enclose the area with plastic and be sure you have a bathroom close by for the subcontractors. You might want to consider a portable toilet if you don’t have a bath off the kitchen. These will typically cost you $70 to $80 per month which includes a cleaning once a week.
Schedule: Here is the typical schedule I use for a kitchen remodel:
-
Adjust Framing: Includes moving/adding walls, adding soffits, kneewalls…etc. Depending on the extent of your changes, this should only take a day.
-
Mechanicals (Plumbing, HVAC, Electrical): I typically go in this order as plumbing drains are pretty much fixed in location, HVAC is next and then electrical. You will want to go over the plan with each trade before starting to make sure they avoid the spaces you need for the other mechanicals if possible. For the typical kitchen remodel, I would figure a day for each mechanical trade.
-
Rough Inspections: Check with you building department for their inspection process. Also ask about particular requirements they may have for a kitchen remodel: they may have specific range ducting requirements, smoke/carbon monoxide detector locations, GFCI locations,…etc.
-
Insulation: Don’t forget to properly insulate and draft stop any soffits you add…these can be a problem in cold climates. This should only take a partial day (again, if you have a really big project, it could take two days)
-
Drywall Hang and finish: The time required to finish drywall can really be affected by temperature and humidity. But assuming normal conditions, I would figure four to five days for your new kitchen remodel.
-
Prime and apply first coat of paint: Make sure the guys remove drywall dust from the walls before priming. You should be able to get this done in 1 or 2 days.
-
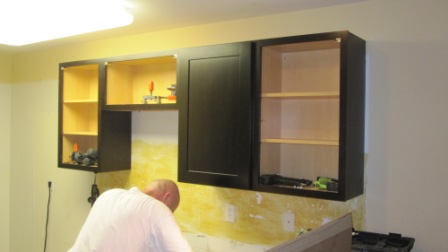
Install Cabinets/Cabinet Trim: Cabinet installation is usually a one day job for a professional on the average kitchen remodel project. If your kitchen is large, they may need to return a second day to finish up hanging cabinets and installing cabinet crown, light rails…etc. Don’t forget to have your installer shim the base cabinets up to match the thickness of your flooring choice.
-
Install Trim and Doors: This typically takes one to two days depending on what type of trim and doors you use. I like to have my painter pre-stain or pre-paint the trim and doors before they are installed. This can be done anytime before the trim carpenter shows up. Just be sure to allow for proper drying. Also keep in mind, you will still need to touch up at the end of the schedule but this gives you a huge head start.
-
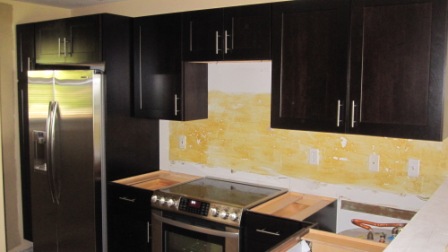
Deliver Appliances: This assumes you have room to store them out of the kitchen. If you have a smaller condo, you may want to have the refrigerator and slide in range brought in later in your kitchen remodel schedule.
-
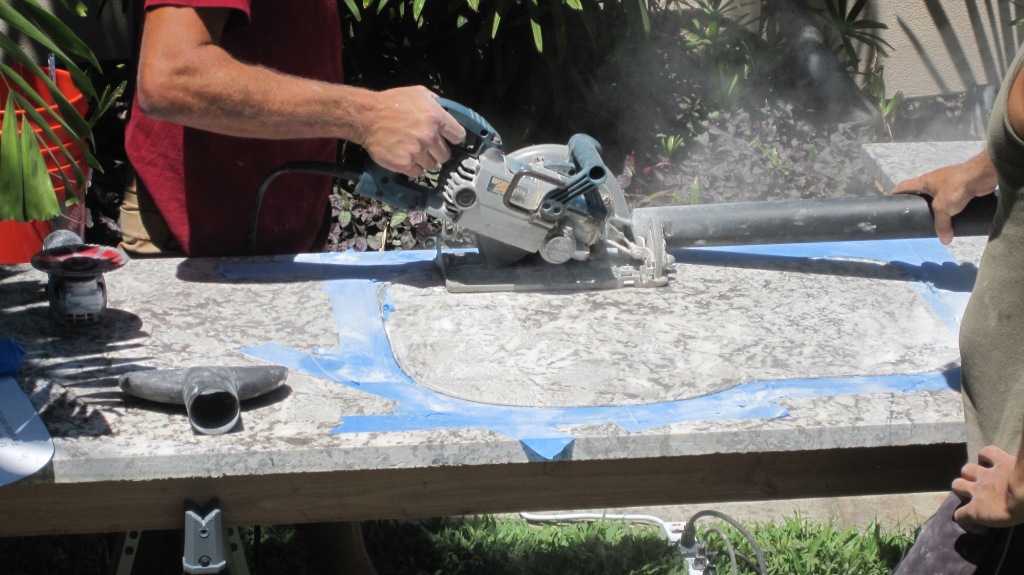
Template for Granite or Solid surface countertops: This should be done immediately after the base cabinets are installed. Granite and solid surface countertops can take up to two weeks to fabricate and install so, we want to get them measured as soon as possible for a kitchen remodel. Make sure you have your sinks, faucets and appliances on site at the time of measure. Many fabricators will take your sink back with them and secure it to the top at their shop. They will also need the faucets to know how big to drill the holes (you will go over locations). If you have a freestanding range, slide in range or cooktop, it’s a good idea to have it on site at this time as well. This way, the fabricator can make sure the cutouts and edges fit perfectly. Check your dishwasher to see if you will need holes drilled in the underside of the countertop. Many dishwashers require you to secure two screws up into the underside of the counter to secure it in place. This can be difficult when you have granite or some other hard material so see if your fabricator can help.
-
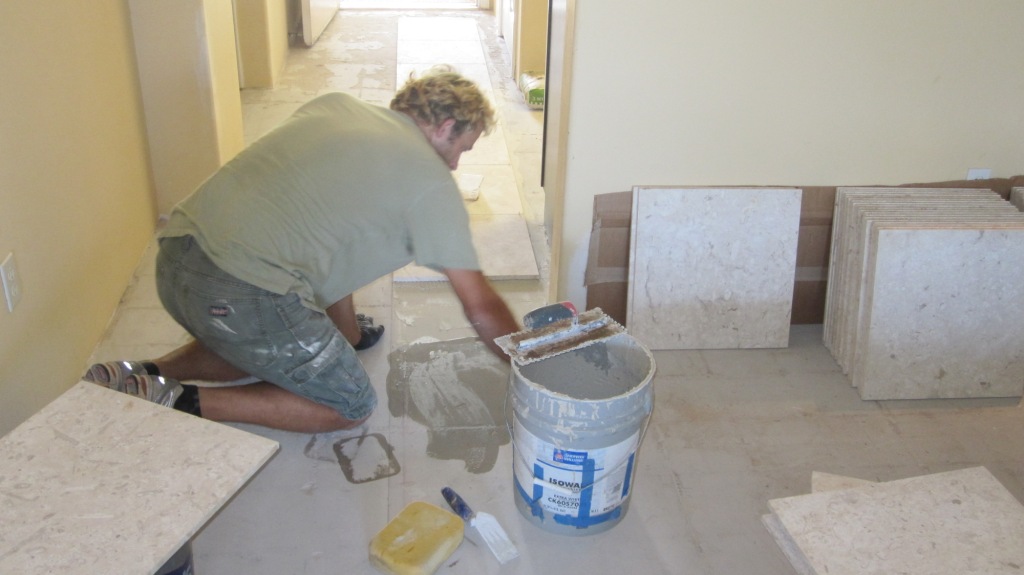
Hard Flooring: For tile, I like to grout at the end of the kitchen remodel job and for site finished hardwood I put the last coat of sealer on at the end of the job…this helps protect the finished product.
-
Install Countertops for your kitchen remodel
-
Final Mechanicals (plumb kitchen sink, install switches, light fixtures, hookup appliances…etc.). Make sure you run all of your appliances and check for leaks. Be sure to look under your dishwasher after running it and look behind your refrigerator if you have an icemaker water line. You don't need a leak to destroy you new kitchen remodel.
-
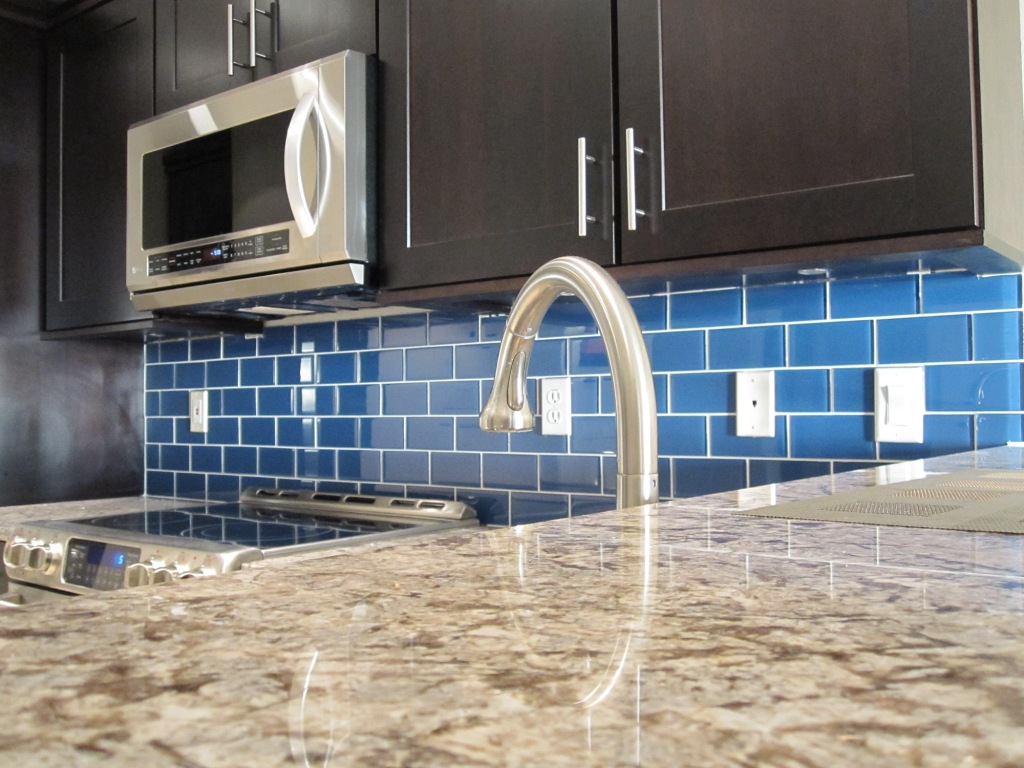
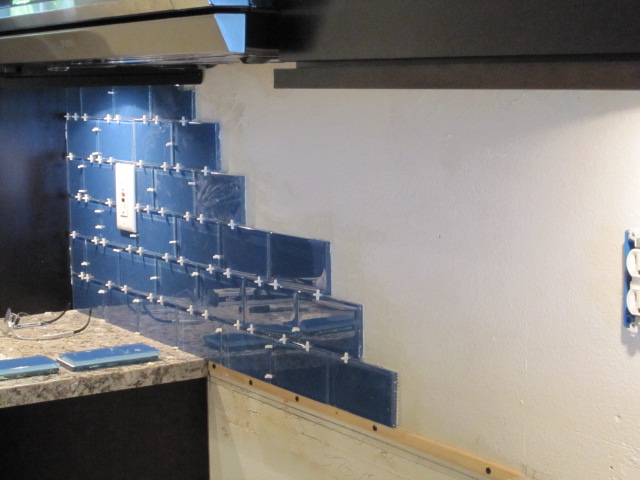
Install Backsplash
-
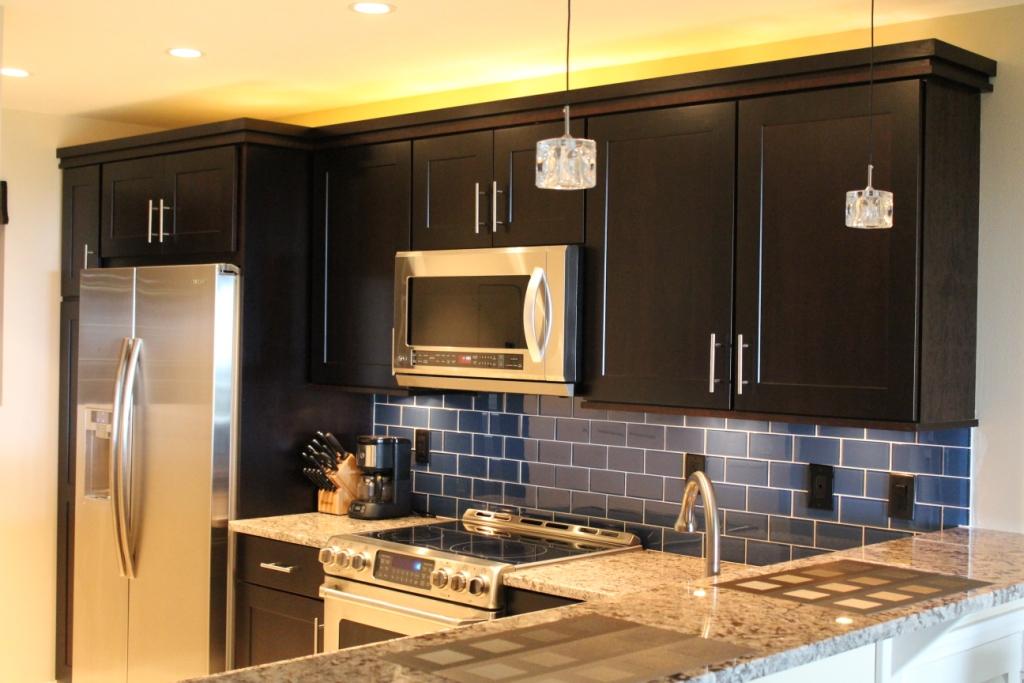
Final Paint: Includes walls, doors and trim.
This kitchen remodel schedule can be adjusted to fit your particular circumstance. Some people like to install the flooring prior to cabinets but as long as your floor installer is careful with the cabinets, your schedule will go faster by installing cabinets first. That way, you can template for countertops and get them fabricated while the flooring is going in. This could end up saving you four or five days in your kitchen remodel schedule. Just be sure you raise up the cabinets to the thickness of the floor you are installing. I typically have my trim carpenter cut small blocks of plywood. This way, your cabinets and toe kicks don’t end up being short. Also, by installing the flooring after cabinets, you will save on your flooring budget as you will have less square footage for material and labor. Some people will laugh at this last comment but I have saved upwards of $500 by not installing flooring under the cabinets. One other thing to think about…you will most likely replace your floor before replacing the cabinets…this has been my experience anyway. If you run the floor under the cabinets, it is harder to remove the old floor in your next kitchen remodel...if you decide to keep or refinish the existing cabinets.
Be prepared for the unexpected. Things will go wrong no matter how hard you try to pre-plan your kitchen remodel project. My last kitchen remodel had several issues during the build out. First, we chose a 18″ by 18″ square coral stone for the floor (basically a limestone). This new tile was a quarter inch thicker than the previous. With the thicker stone, the front entry door would not clear. So, I had to remove the door, cut it down and add a new threshold piece (the threshold was not adjustable). The next problem in our kitchen remodel involved the pullout pantry cabinet we chose to install in the corner of the kitchen in front of the window. The window sill had to be removed so the cabinet would clear when pulled out. We drywalled the sill and had to search “high and low” for a window covering that would not protrude past the window jamb.
Yes, you will run into problems with any building project. You just need to evaluate each problem and come up with the best possible solution for your circumstances. A nice new kitchen remodel is a great project for the owner-builder. For more information on installing a backsplash in your new kitchen remodel project, check out our video...Kitchen Tile Backsplash Installation.
Now let's get going on your new kitchen remodel project!
Photos coutesy of Blue Maui Photographers.